DRY INSTALLATION
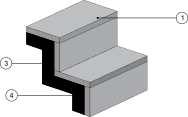
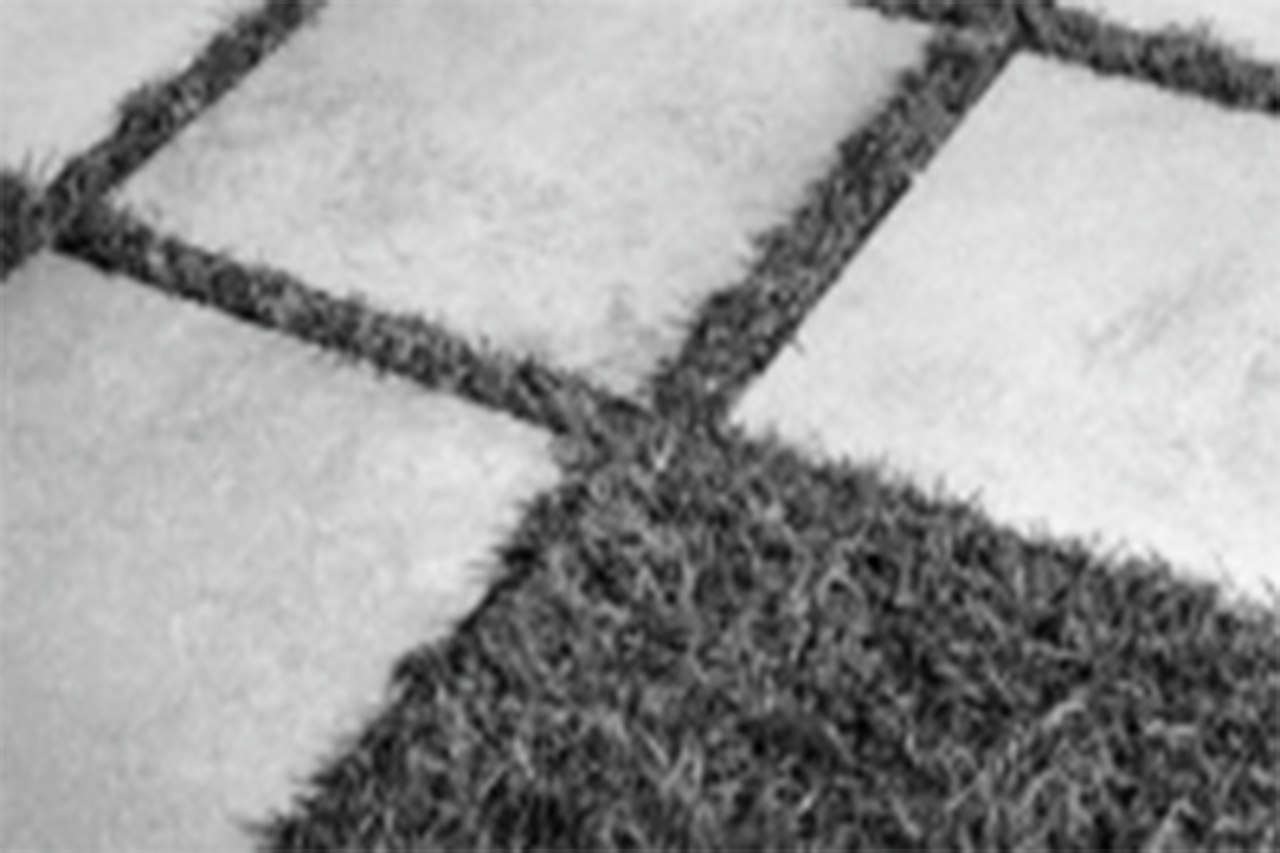
ON GRASS
Easy to lay, adjust, and move. An ideal solution for public parks and private gardens.
More


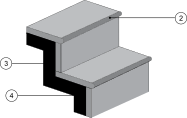
Easy to lay, adjust, and move. An ideal solution for public parks and private gardens.
More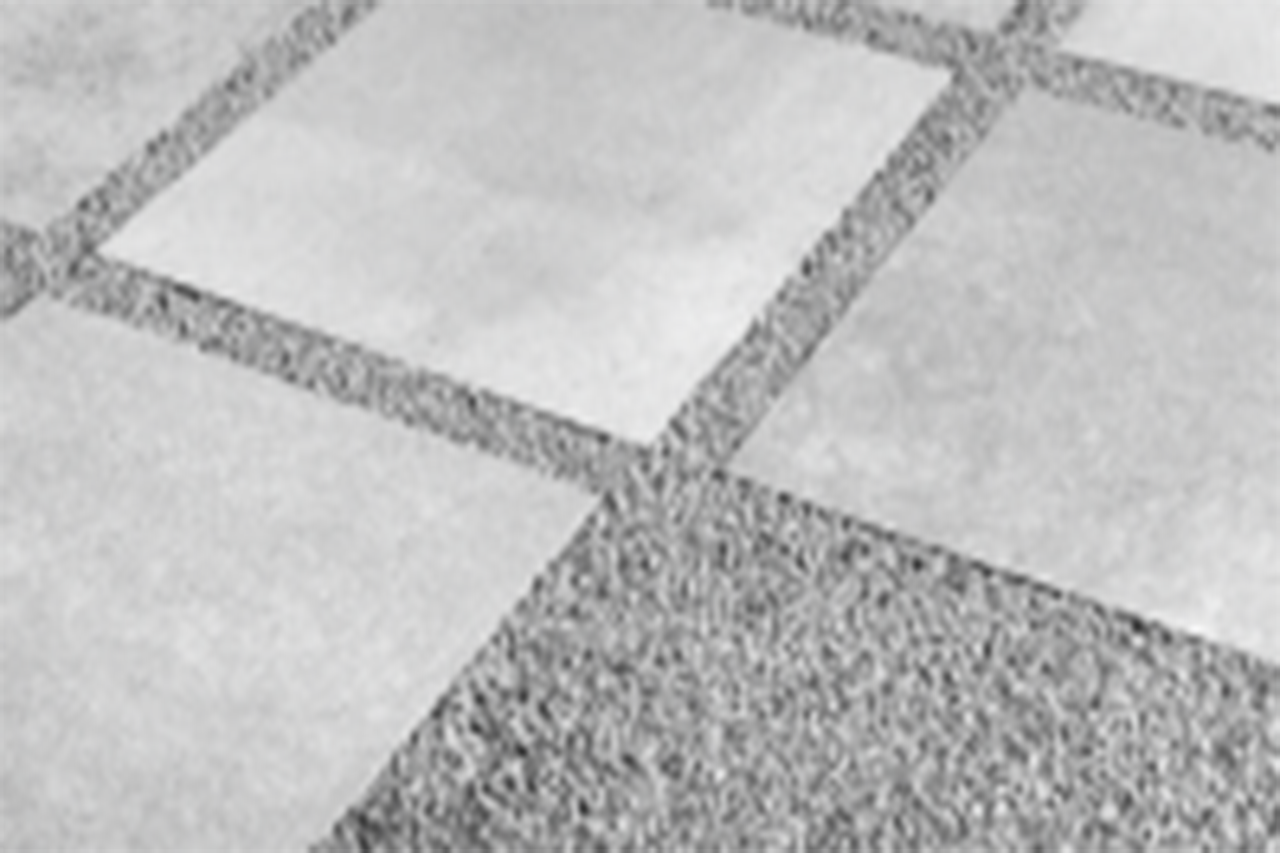
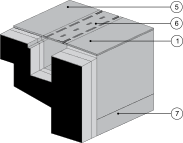
Easy to lay, adjust, and move. Boasts ideal aesthetic. features to enhance contemporary buildings
More
Build resilient and durable outdoor spaces, pathways, driveways, and more with the installation of 20mm tiles on screed with adhesive
More
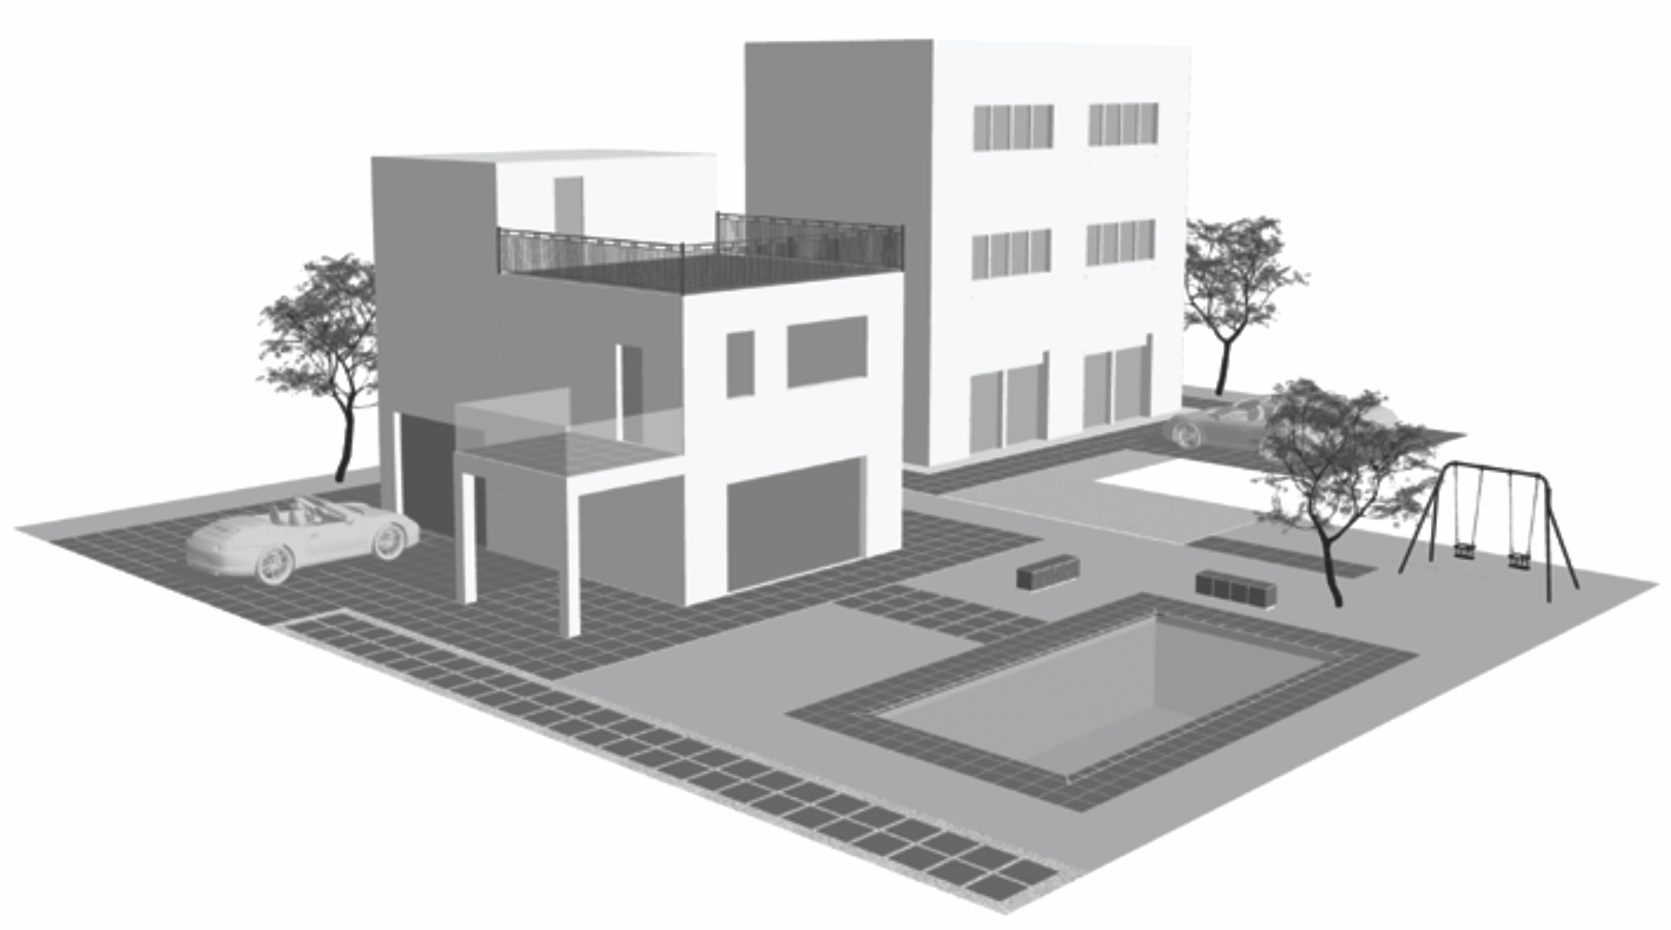
Easily removable, inspectable, and reusable. Ideal to be applied with different kinds of support and is apt for concealing wiring pipes, and more with accessibility
More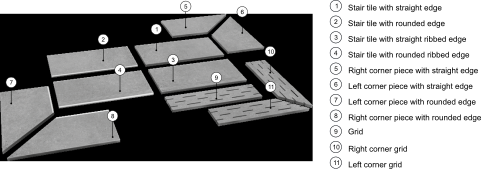
In order to guarantee excellent aesthetics and functionality for the various possible applications, the 20mm outdoor porcelain Simstone tile collections have a rich set of step elements and special pieces.
More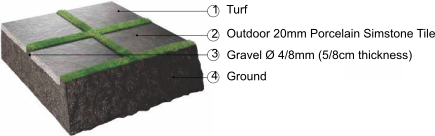


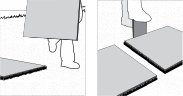
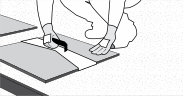
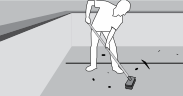
To determine the correct sizing and positioning of the flooring, place the tiles on the ground and carefully position them equidistant from each other. Mark the perimeter of the tile using a spade in the soil.
Remove the turf and dig out about 5cm of soil. Form a stable and uniform substrate using fine gravel (grain size 4/8mm).

Lay the tile, so as to have an approximately 0.5cm level difference, between the tile and the ground. To simplify tile installation it is possible to use suitable tile installation handles. Knock the tile along the edges with a rubber hammer until it is at the same level as the turf
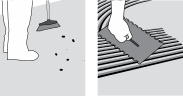
For installation on sand it is good to remember to place a geotextile on the gravel, on which to spread out a layer (from 2 to 5cm thick) of dry sand with a grain size of 0/2mm. It is necessary to compact the sand with a vibro-compacting plate
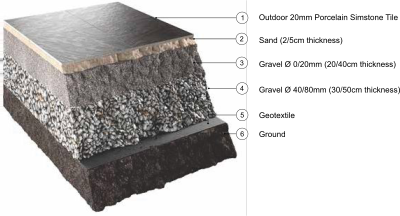
before proceeding with the installation of the tiles. For particular uses and for stressful loads, it is advisable to consult a technician in order to calculate precisely the thicknesses of the various layers of the substrate.

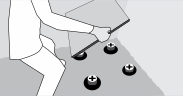
Spacers designed for laying tiles on sand or gravel are an extremely versatile and practical system despite their simplicity.

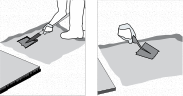
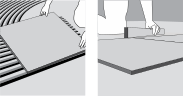
Form a stable and uniform substrate using fine gravel or sand. Level the substrate with a metal straight edge.
Position the tile and then compact the edges in order to level the tile with the substrate. It is suggested to use a joint of at least 4mm to allow good water drainage.

IN ORDER TO AVOID THE DISPLACEMENT OF THE SUBSTRATE AND CONSEQUENTLY THE TILES, THE SUBSTRATE MUST BE PARTITIONED WITH CONTAINMENT EDGES OR PERIMETER CURBS.


Before proceeding with the installation clean the substrate thoroughly. In order to obtain a flat floor, it is important to apply an even layer of adhesive.
Check the planarity of the flooring regularly during the laying operations.

Once the installation is finished grout the flooring. Remember to observe the times indicated by the manufacturer for light foot traffic before walking on the tiles.
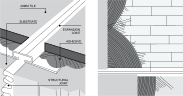
In correspondence with a structural or dividing joint in the screed, it is mandatory to provide an expansion joint with a width that is at least the size of the existing one. If there are joints between different surface types, it is mandatory to provide an expansion joint.

Around fixed elements of the supporting structure, such as walls, steps, columns, etc., it is mandatory to provide peripheral joints with a width of between 4 and 12mm.

IN ORDER TO AVOID AESTHETICALLY UNPLEASANT CUTS OF THE TILES, IT IS SUGGESTED TO DEFINE THE SLOPES OF THE SCREED TAKING INTO ACCOUNT THE SIZE CHOSEN FOR THE INSTALLATION.

The installation on the plastic supports must only been done on perfectly waterproof substrates. Before proceeding with the installation clean the substrate thoroughly
With regard to the number and position of the supports, as well as the type of reinforcement on the back of the slab, it is recommended to follow the instructions given in the following table, which are essential to evenly distribute the load.
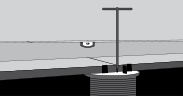
With the use of the special adjustment key it is possible to obtain a perfectly stable surface and with the required slope for better water drainage.